Breadboarding Basics
Brief Description
Breadboarding is how all great electronics projects starts. Not only is it a crucial tool in prototyping but also handy for learning new skills and concepts.

How It Works
Breadboards are essential tools for building and testing electronic circuits without soldering. They provide a platform to easily connect components using a grid of conductive strips hidden beneath a perforated plastic surface. Here’s a detailed look at how they work:
Structure
- Top Layer:
- The surface of a breadboard consists of a grid of holes (known as tie points) arranged in rows and columns.
- These holes allow you to insert electronic components and wires.
- Internal Connections:
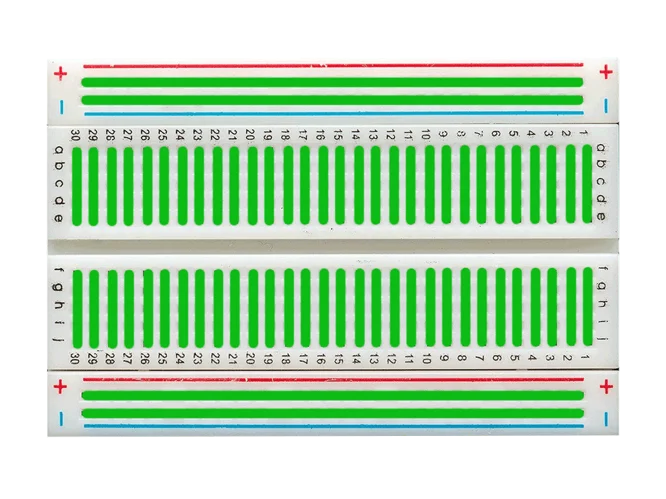
- Rows: In the central area (often called the terminal strips), each row of five holes is electrically connected underneath. This means that any component leads or wires inserted into these five holes are electrically connected to each other.
- Columns: On the sides of the breadboard, there are columns (usually marked with a red line for power and a blue or black line for ground) known as bus strips. Each column is electrically connected along its length. These provide a convenient way to distribute power and ground to different parts of your circuit.
Using a Breadboard
- Power Rails:
- Typically, breadboards have power rails running along the top and bottom edges. These are used to distribute power (positive voltage) and ground (negative voltage or zero volts) across the board.
- You can connect your power supply to these rails, making it easier to connect components to power and ground.
- Building Circuits:
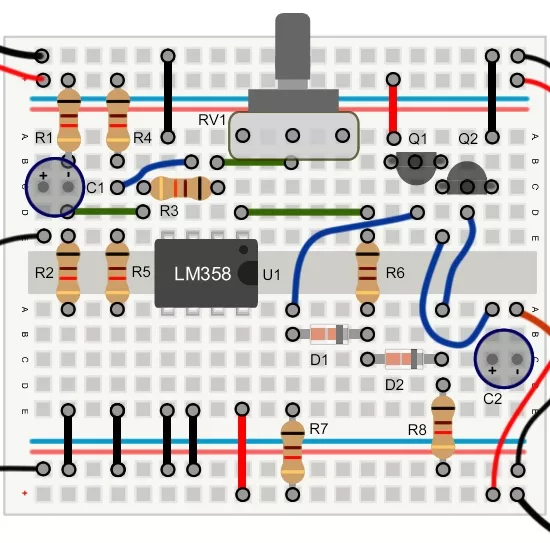
- Insert components such as resistors, capacitors, LEDs, transistors, and integrated circuits into the holes.
- Use jumper wires to connect different parts of the circuit. Wires should be inserted into the appropriate rows and columns to create the desired connections.
- Integrated circuits (ICs) are typically placed straddling the center divider so that each pin can be accessed independently.
Advantages
- No Soldering Required: This makes it easy to modify circuits and reuse components.
- Reusable: Components and wires can be easily removed and repositioned.
- Versatile: Suitable for prototyping a wide variety of circuits, from simple to complex.


Apparatus Needed
- Breadboard
- Jumper wires